NetEmulator® User Manual
The four distinct areas of the NetEmulator are:
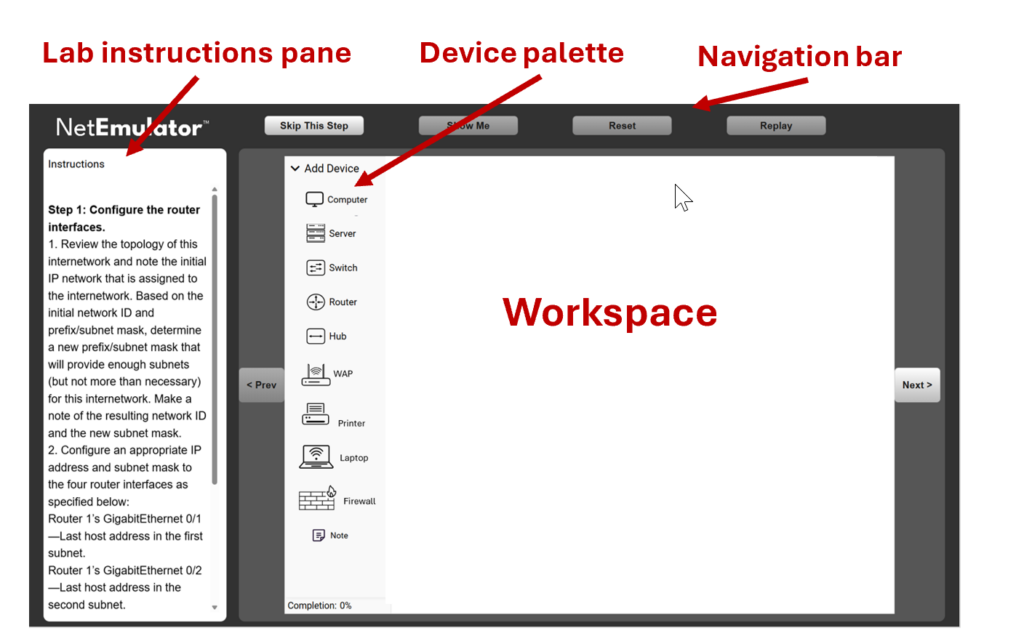
The Lab instructions pane
Except for the Sandbox Lab and Capstone Project, each Lab “Step” gets a series of numbered instructions. For the most introductory of labs, these instructions are basically a click-by-click set of tasks to complete. For more advanced troubleshooting labs the instructions will be much shorter and less detailed. They will get instructions of the type “why is Computer Y not able to communicate with Computer X across the internetwork”. In a capstone project the student will face a blank workspace and get a specification for a network to create from scratch.
The Device Palette – Activating devices
To activate a device and add it to the workspace, click it; it will appear in the upper-left corner of the workspace, with its label above and the number 1.
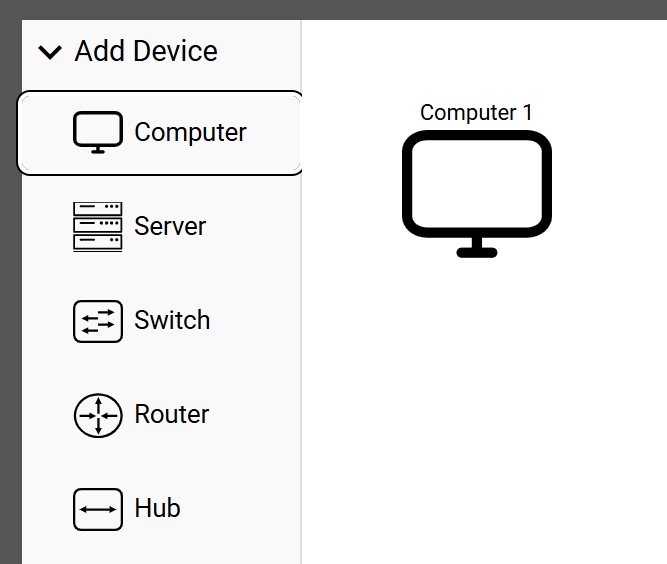
If you click Computer again, the same thing happens, except this time the label shows its number increased by 1, becoming Computer 2. All devices operate on the same principle.

There is no limit on the number of devices you can add. The workspace is also virtually unlimited, as you can pan out as much as you may need.
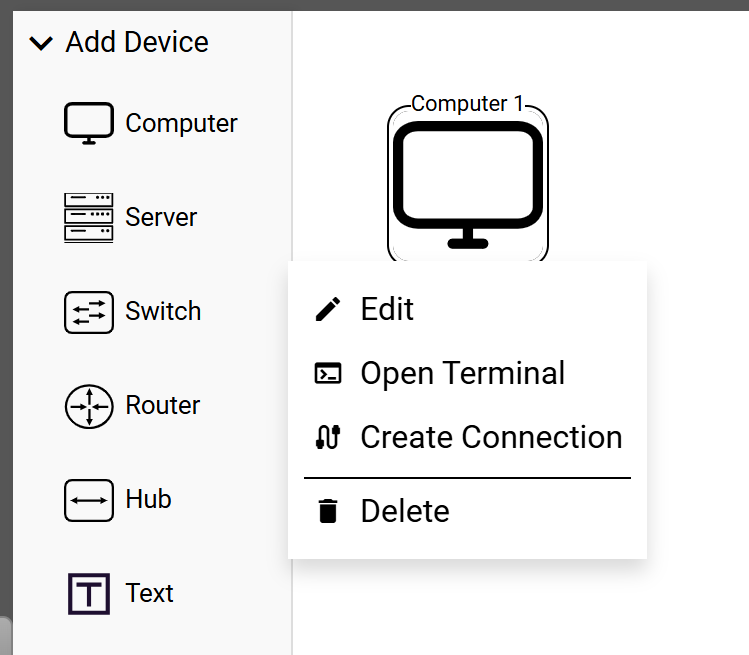
Right-click a device, and the device menu appears. In Edit, you configure the device by adding items such as IP address, Subnet mask, and default gateway. This varies obviously depending on the device type selected.
Open Terminal opens the CLI.
Create Connection allows you to connect this device to another one, such as this computer to a switch.
Delete removes the selected device from the workspace.
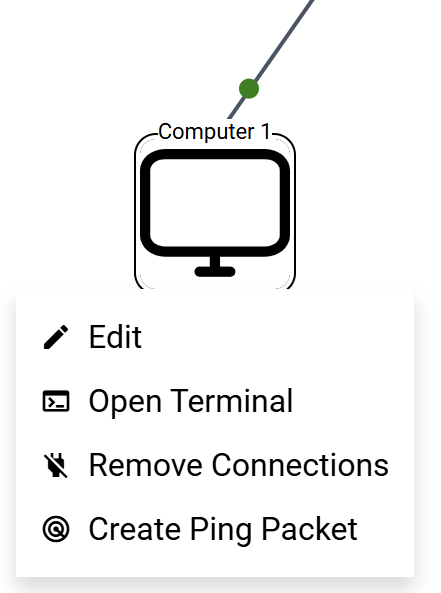
The above example is based on a new device added to the workspace. After that device is connected to other devices, the menu that appears when you right-click it changes and offers a new set of actions.
The new actions offered are:
Select Remove Connections to remove any connection(s) implemented for this device.
Create a Ping Packet will ready a Ping Packet and activate it once you select a destination device. On the first ping, an ARP broadcast will be sent, but not on subsequent ones.
To create a connection, click Create Connection and follow the prompts. You will need to select a node, a cable type, and a port. If the connection cabling turns green, you have a functioning connection. If it’s orange, it is not ready to function fully.
At the very bottom of the palette, you can see “Completion” followed by a 0% – 100% number showing the level of completion (and score) obtained for this single Step. As opposed to the end of lab grading that is an overall grade for the entirety of the lab, this completion rate applies only to the Step you are currently working on. If you click it, it will show you the detail of what actions are graded.
Click here to see a demonstration lab where you can test these instructions. See a demonstration
The Navigation bar
The Navigation bar has features that vary depending on the version of NetEmulator you are using. The basic version has at a minimum these four buttons:
Skip This Step – To be used if you don’t want to complete the step you are currently working on. You will get a warning stating that confirming this choice will grade you as “incomplete” and make a score of 100% on the labs unattainable.
Show me – When in a lab, this will present you with a short video demonstrating how to complete all the tasks in the current step successfully. At the end of the lab quiz, clicking this button will show the correct answer. In Challenge Mode, the Show me feature is disabled both in the lab and the quiz.
Reset – Will reset the lab step. This is like resetting a web page, except that here it only resets to the initial state of a Step or an interactive question at the end of the lab quiz.
Replay – Will replay any interactivity shown in the workspace. This is only applicable if such a demonstration is available in the workspace.
Two additional features are available in some premium versions of NetEmulator™.
Course – This is available when NetEmulator is providing a complete course in addition to the labs.
Lab Assistant – Available in the premium version of NetEmulator™ that offers this AI-powered Lab Assistant.
The workspace
The workspace is where you perform all the lab tasks. Additionally, on top of this space, you have the Running Log.
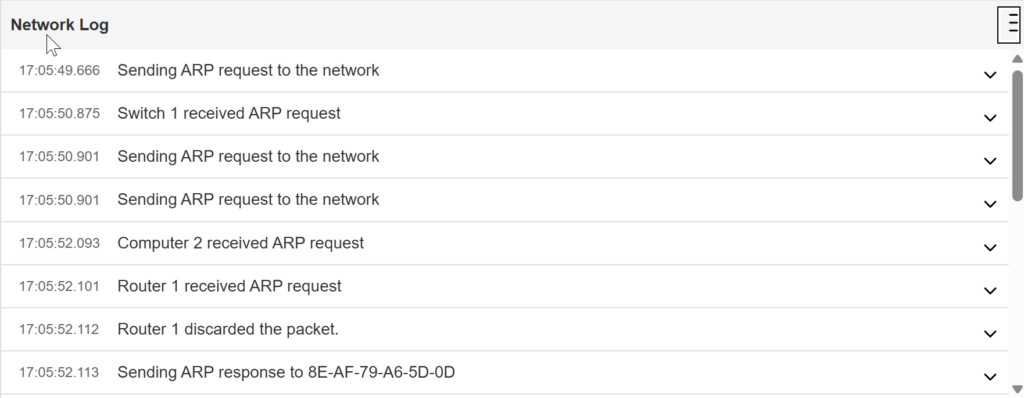
This feature lets you view the running commentary on actions taken during a lab session. Here you see the last log entry after a successful ping

If you click the down arrow in the upper-left corner, the Network Log will display each step of the Ping. Here, you can see the first steps, which involve an ARP request because the destination computer’s MAC address is not yet known. To see all the steps to the conclusion of the Ping, scroll down the log.
After clicking “Create Ping Packet” and selecting the destination device, the action and status bar appear at the top of the workspace, just under the Running Log. To the left is the Send (single arrow) that will launch an entire Ping session from beginning to end. The double arrow also launches the Ping session, but only to the next step. Use this feature if you want the opportunity to analyze each step individually.

The “X” closes the Send feature, which you must do to create a new Ping packet, as the “Create Ping Packet” menu entry will not appear while the Send feature is open. The feature only shows if and when you request a Ping.
Grading
First, a reminder: The self-check questions between lab steps are never graded. They are purely formative and are designed to prompt reflection and reinforce understanding of the concepts explored in each step.
The overall grading can be formative if a result of Study Mode, or summative if used in Challenge Mode.
The end-of-lab grading screen contains three tabs:
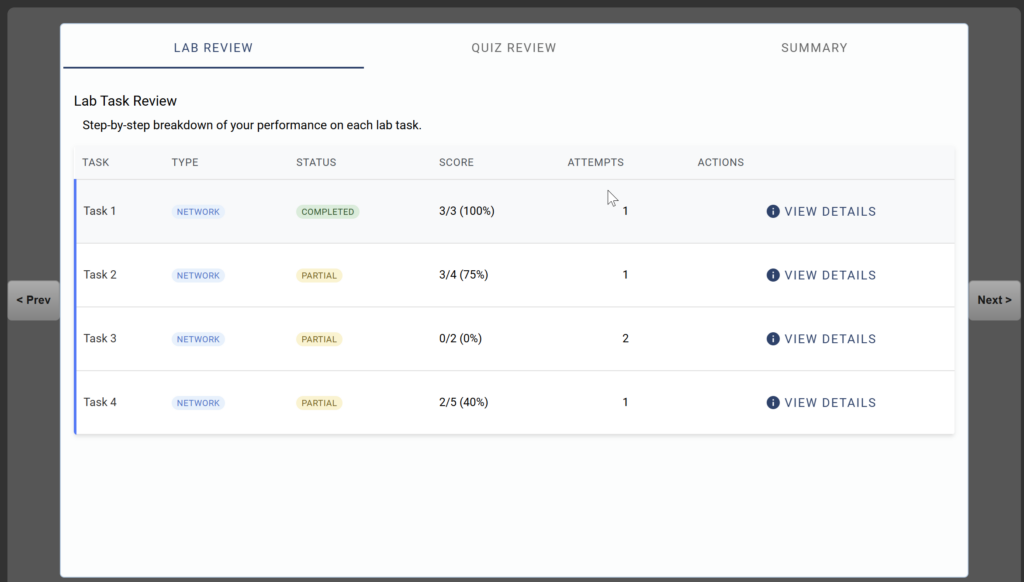
Lab Review
Shows completion rate and your score. Additionally, it shows the number of attempts you made in each step before succeeding (an implied measure of mastery). Finally, if you click “View details,” you will see what was graded and each of your scores for each of those tasks.
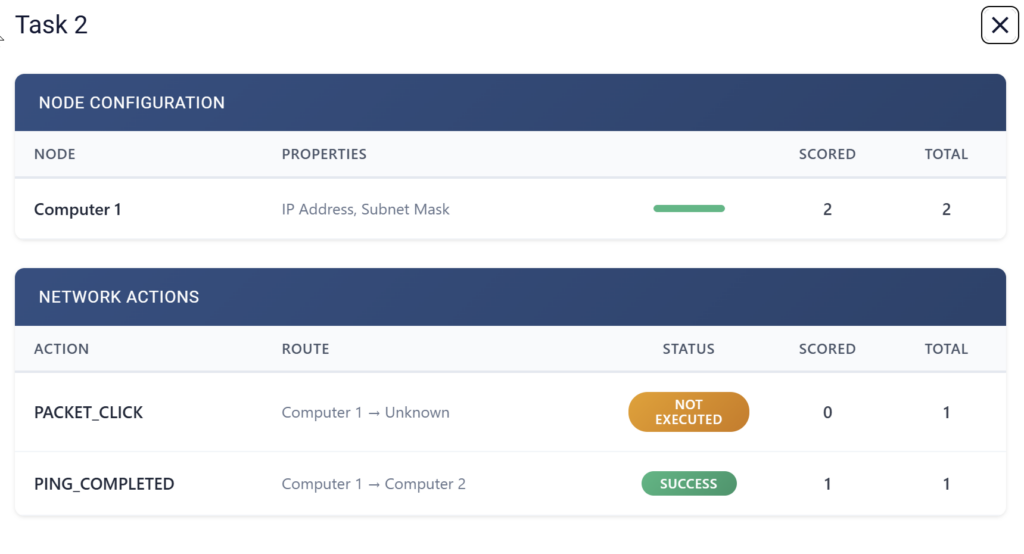
Clicking “View details” displays the detail of your scores for each Step & Task:
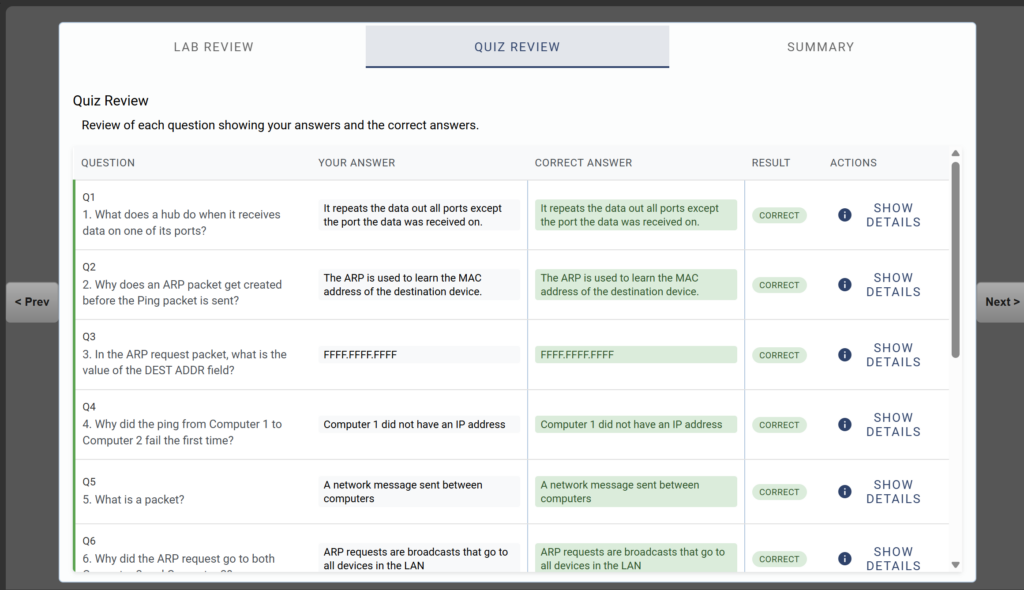
Quiz Review
Shows your score on each of the end-of-lab quiz questions. It displays the question, your answer, the correct answer, and the result. Under Actions, clicking “Show Details” will display an explanation of the answer.
Summary
The summary tab will show you the Lab grade, the Quiz grade, and the overall grade, which is the average of both.
